Here’s a description what you need to do to use the Printer Control to change the names coded in SPORTident finger sticks. Before you begin, you need to have the following items: a Windows computer, that either has a serial port, or you may need to get a serial to USB converter (see here for more info).

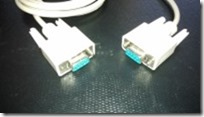
You will need the serial interconnect cable, which came with the printer kit. It has female RS-232 ports at both ends. It is also known as a NULL-Modem cable (see photo, above).
And finally, you’ll need some software, which you can download from http://www.sportident.com:
- the USB / RS-232 driver for stations
- SPORTident Config
- SPORTident Personal
Connect the printer control to the serial interconnect cable, and connect the other end of the interconnect to the computer’s serial port, or the USB-toSerial converter. Know what the COM port number is. A converter normally tells you when you first plug it in. There are ways to find out, but that’s beyond this article.
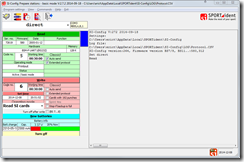
Before you can change the SI-Stick name, you have to reprogram the Printer Control to be a download control instead. For this you use SI-Config. In the below picture you can see that I read the Printer control directly – setting the big white bar below the menu buttons to “direct”, then pressing the green Read button.

(click image for full-size)
I can see that it is a BSM-P – a printer control. Change the Operating Mode in the red section to “Read SI cards”, and do not have any of the check boxes enabled. Press the red Write button. Note that the code number has to be below 31, and it can be the same as what the printer control currently is, as shown in the green section. Take a screen shot, because you will have to program the unit back to being a printer control at the end of the exercise.
Once you have reprogrammed the unit, you can bring up SI-Personal. Make sure you leave the control plugged in until you have exited SI-Personal, as it further programs the control to be able to change the personal info in an SI stick.
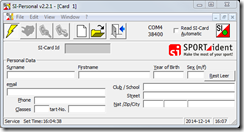
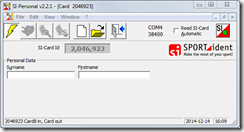
When you first bring up SI-Personal, it shows all possible fields that might be settable on some types of finger sticks. Briefly insert the stick you want to edit. This will remove the fields you cannot program.
| Before inserting an SI-8 | After insertion and removal of an SI-8 |
 |  |
Now fill the fields you want (there are no mandatory fields). When you’re ready to copy the contents onto the stick, insert it again – and hold it there. You will notice that the read and write buttons are enabled when the SI stick is in the control. Now press the write button, or press CTRL-W. The unit will now start to beep, once a second. Remove the SI stick, and press the button showing the empty sheet of paper. Re-insert the stick, and press the Read button (or press CTRL-R). You should see the contents you have just programmed onto the stick.
When done with SI-Personal, fire up SI-Config again. I suggest you read the control first, to insure all your settings to interact with the control are correct. Once you have read the control, change the Operating Mode back to “Printout”, then press the red Write button.
That’s it!